Table of Contents
This is a simple tutorial showing how to set up a MQTT-SN gateway using MQTT For Small Things (SN) written in Java.
This step is usually needed if you want to use the MQTT-SN client for embeNET.
Introduction
In this simple tutorial we will set up the MQTT-SN Gateway. This gateway is a software service written in Java by Simon Johnson. This service allows to translate the UDP-based MQTT-SN communication to a standard TCP-based MQTT protocol. The job of the gateway is to connect MQTT-SN enabled clients to a standard MQTT broker. The software is distributed using Apache License.
Step 1: Download and run the gateway software
You can download a released JAVA binary of MQTT-SN gateway from github. At the time of writing this tutorial the current version is 0.2.2 and the filename to download is mqtt-sn-gateway-console-0.2.2.jar. This is what we will use in this example. In order to run the software you need the Java Runtime Environment (JRE) but this is most likely already present in your system.
Once downloaded you can run the JAR file via commandline, giving two arguments:
- local udp port number for MQTT-SN clients
- gatewayId, which is a string identifying the gateway
The port number denotes a port that will be open for incomming MQTT-SN traffic from clients.
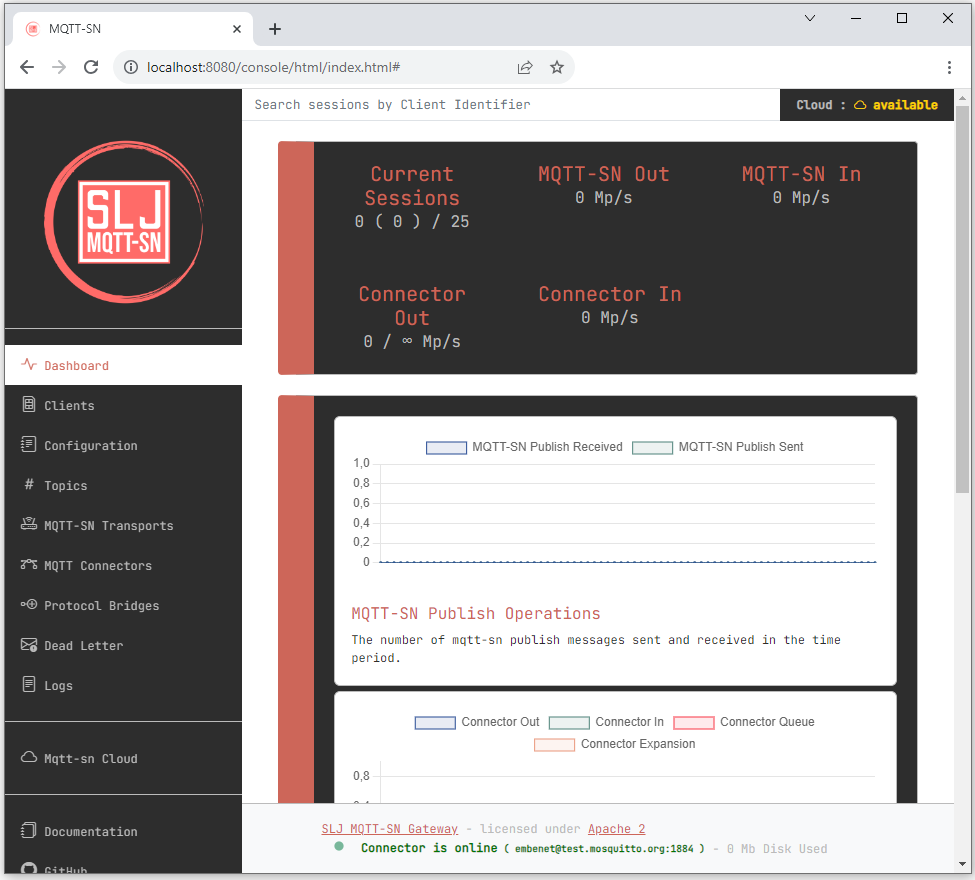
Once started the gateway can be accessed through a web inteface at default port 8080. Open the http://localhost:8080 URL and you should see the web interface. The default username and password is admin / password.
Once logged into the Gateway's web inteface you can view several statistics concerning traffic, clients, topics etc.

Step 2: Configure the gateway
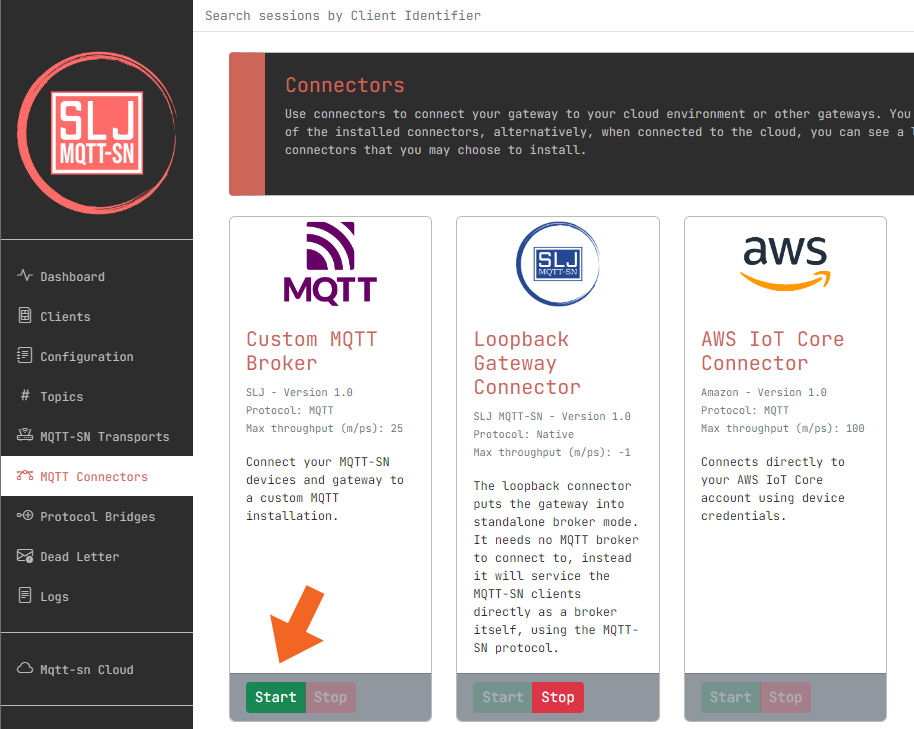
We will now configure the connection with the MQTT broker. To do that go to the MQTT Connectors panel and press the Start button on the Custom MQTT Broker tile:

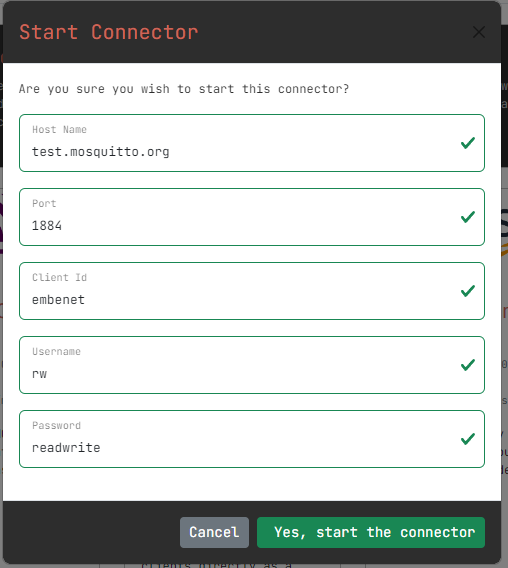
In the pop up window fill in the connection details. Here we will use a popular mosquitto test broker avaliable at test.mosquitto.org.

Note that we are using port number 1884 which allows for unencrypted but authenticated access (more details here).
If we've got it right then clicking Yes, start the connector should stop the default loopback connector and connect us to the mosquitto broker. This will be incicated by following sign:

Step 3: Verify the gateway (optional)
There are may ways you may verify that the MQTT-SN Gateway is running. We will use the client tool distributed alongside the gateway. You can download a released JAVA binary of MQTT-SN client from github. At the time of writing this tutorial the current version is 0.2.2 and the filename to download is mqtt-sn-client-0.2.2.jar.
Running the client
Once downloaded run the client application it like this:
Next give the details about the running Gateway.
- remote hostName or ip address : localhost
- remote port: 1885
- client Id: testclient (whatever)
- protocol version: 1 (we will use version 1.2)
You should see the following output:
Connecting to the Gateway
Type CONNECT, press ENTER and provide the following answers:
- clean session : yes
- keepAlive (in seconds): 60
You should see the following output:
Subscribing to the topic
Type SUBSCRIBE, press ENTER and provide the following answers:
- topic to subscribe to : state (or any other topic)
- QoS: 0
You should see the following output:
Publishing to a topic
Type PUBLISH, press ENTER and provide the following answers:
- topic to publish to: ledControl
- QoS: 0
- retained publish: no
- message: LEDON
You should see the following output:
Disconnecting and exiting
Simply type DISCONNECT and EXIT
Troubleshooting
We've found that the MQTT-SN Gateway may fail to run again if not closed properly. In such case delete the mqtt-sn-runtimes folder the application creates and restart.
Generated on Tue Nov 21 2023 18:28:49 for MQTT-SN Client for embeNET by


